Knowledge7

The Linux and Mobile Solution Provider

  • About
  • Training
  • Services
  • Clients
  • In the news
  • Blog
  • Contact Us
You are here: Home / Archives for Avinash Meetoo

Lists and Adapters

This topic is part of our Android Application Development training

Data-centric applications normally have to display a lot of information and Android has two important widgets which can be used to display a lot of information in a small space:

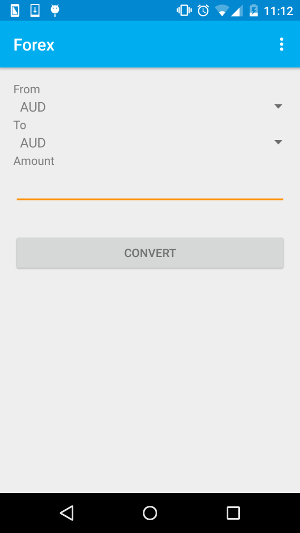
  • Spinner: We have used a spinner when developing the Forex app previously. We have seen how it needs an adapter to display its data.
  • ListView/RecyclerView: This is a scrollable list of items which can be clicked on. ListViews/RecyclerViews also require an adapter to work.

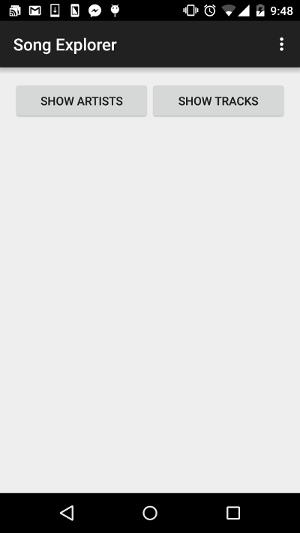
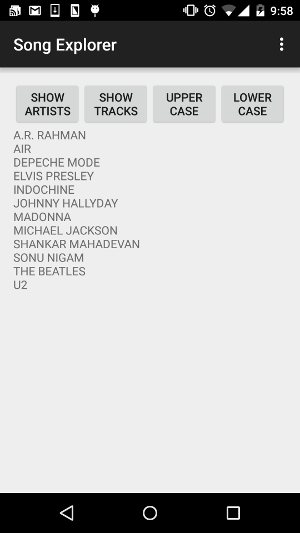
In the previous lesson on databases we developed the Song Explorer app which basically retrieves a list of artists and tracks from a database and displays it on the screen using a TextView. However, using a TextView for this purpose has some limitations. For instance, we cannot select one specific item and click on it to get more details. The best way to display a list of items in Android is to use a ListView/RecyclerView.

ListView vs RecyclerView

When using lists to display data, you need to get references to each view component for each item in the list. If your list has only a few items that’s fine but if your list has let say hundred items, repeatedly calling findViewById() can slow down performance and as a result the scrolling experience won’t be smooth. To address the issue, it is recommended to use a pattern called the ViewHolder pattern which basically recycles views when they go out of the screen when you scroll. So instead of creating new view components for each item in the list, we reuse those which are not displayed on the screen.

Previously, one could make ListView scrolling smooth by implementing the ViewHolder pattern in the corresponding ListView adapter. However, this was an optional thing. With the advent of Android Lollipop, RecyclerView was introduced. RecyclerView is a much more powerful, flexible and a major enhancement over ListView. For instance, RecyclerView makes the use of ViewHolder compulsory using the RecyclerView.ViewHolder class. It also has additional functionalities for item animation and item decoration among others.

Song Explorer v4

20150820-song-explorer-v4

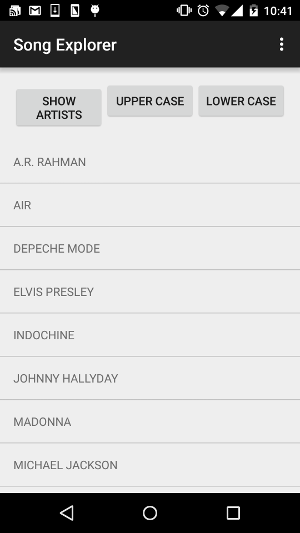
Here, we’ll develop version 4 of the Song Explorer app. Instead of displaying the list of artists in a TextView, we’ll display it using a nice RecyclerView. For that, we’ll also have to create ArtistAdapter class which will extend RecyclerView.Adapter.

Song Explorer v5

Till now, we have only displayed the artist name. However, in the database, we also have the artist id and the artist bio. In Android, it is possible to customise lists to display more than one piece of information for each item in the list. For example, for one item, we can display a thumbnail image to the left and other pieces of information to the right of the image. In version 5 of the app, we learn the basics of creating custom lists by displaying the artist id together with the artist name.

Song Explorer v6

20150820-song-explorer-v6

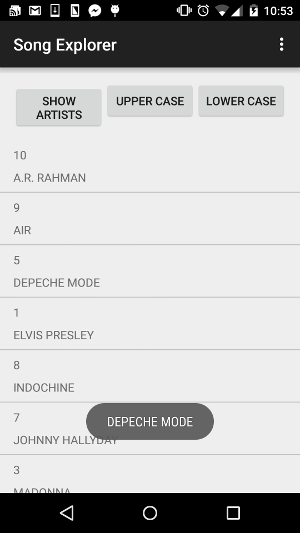
In version 5 of the Song Explorer app, we have a nice RecyclerView displaying a list of artists which includes the artist’s id and the artist’s name. As mentioned previously, one interesting feature of using ListViews/RecyclerViews is that we can click on a specific item in the list. Till now, when clicking on a specific item, nothing happens. In version 6, when clicking on a specific item, the name of the artist is displayed in a Toast.
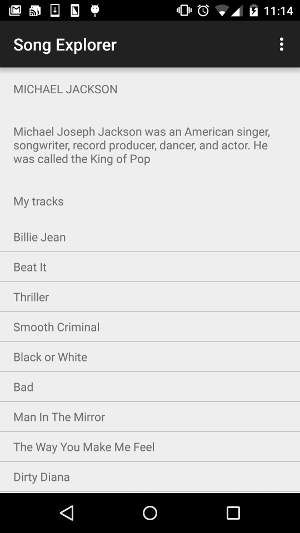
Song Explorer v7

As you are probably guessing, displaying the name of the artist in a Toast is not very useful. In version 7, when clicking on an item in the list, we display more details about that particular artist (i.e. artist name, bio and tracks)on a different screen. To achieve this, the following needs to be done:

  • Create a new activity, ArtistDetailsActivity, and add it to the AndroidManifest.xml file
  • Update the onClick() in ArtistAdapter to start the new activity and pass in the artist id
  • Get the artist id in the new activity (ArtistDetailsActivity) and retrieve the corresponding artist name and bio from the database and display those in two respective TextViews
  • Retrieve the list of tracks for that particular artist from the database
  • Create a RecyclerView and a corresponding TrackAdapter to display the list of tracks for the artist

20150820-song-explorer-v7

Song Explorer v8

The last enhancement to bring to the application is to allow the user to specify whether the list of artists should be sorted by the artist id or by the artist name. The next time the application starts, the list should be displayed in the chosen order. To do that, a preference screen should be created using the XML editor, then a class (SettingsActivity) derived from PreferenceActivity should be created and the onCreate method overriden. This new activity should be manually added to AndroidManifest.xml.

When this activity is launched (using, for example, startActivity), the Android framework will automatically store the preferences.

Here, the preference screen will be launched when the user select settings in the menu which can be accessed through the bar at the top (also known as the action bar). To do this, startActivity() should be called accordingly in the onOptionsItemSelected() method in MainActivity.

You will notice that the preference screen doesn’t have the action bar at the top. This is because unlike MainActivity, SettingsActivity extends PreferenceActivity instead of AppCompatActivity. We will see later on what AppCompatActivity is all about and how to add an action bar to SettingsActivity too.

Finally, the application will have to be updated to display the list of artists in the appropriate order based on the user’s selection. The way to do that is to get a SharedPreference object from the PreferenceManager, retrieve the corresponding setting value and use the appropriate SQL statement when querying the database.

This topic is part of our Android Application Development training

Our forthcoming training courses

  • No training courses are scheduled.

Databases

This topic is part of our Android Application Development training

All Android devices have SQLite built-in and, consequently, Android applications can use this SQL database to store and manipulate data.

The SQLiteOpenHelper class needs to be derived and the two following methods implemented:

  • onCreate: Called when the database is created for the first time. This is where the creation of tables and the initial population of the tables should happen.
  • onUpgrade: Called when the database needs to be upgraded. The implementation should use this method to drop tables, add tables, or do anything else it needs to upgrade to the new schema version.

In addition to the two methods, the constructor also needs to be overrriden to indicate the database name as well as the version (starting at 1; if the database is older, onUpgrade will be used to upgrade the database).

Song Explorer v1

20150820-song-explorer-v1

The work to do is to implement the Song Explorer app which will make use of a database to store data about artists and tracks. In version 1 of the app, the artists table will be created and populated with data. There will be two buttons namely Show Artists and Show Tracks. On pressing the Show Artists button, a list of artists will be retrieved from the database and displayed on the screen. Pressing the Show Tracks button will initially provoke an error as the version 1 database only contains information about artists. Version 2 of the app will solve the issue.

Note that two methods of the SQLiteDatabase class are useful here:

  • execSQL: for executing inserts, updates and deletes
  • rawQuery: for executing an SQL query and returning a Cursor object

Song Explorer v2

In version 2 of the Song Explorer app, we add a new table called tracks and populate it with some data. Since we are changing the database schema, we have to change the database version number and implement the onUpgrade method accordingly. Now, pressing the Show Tracks button displays a list of tracks.

Song Explorer v3

20150820-song-explorer-v3

In version 3, we add two new buttons. The first one allows us to change the letters of the artists’ names to uppercase and the second one allows us to change the names to lowercase. While in the two previous versions we were concerned only with retrieving data, here we have to update data.

This topic is part of our Android Application Development training

Our forthcoming training courses

  • No training courses are scheduled.

Linux has won and you should not wait too long

20150818-aventador

Top500 is a website which lists and describes the most powerful supercomputers on the planet. 97% of them run Linux. The majority of mobile devices on the planet run Android, a Linux distribution. The cloud is powered by Linux including the Google and Amazon cloud services. More and more appliances are now powered by Linux, including typical ADSL modems, firewalls and TVs. I am not even mentioning the myriad of IoT devices. Even without those, there are more devices running Linux on the planet than devices running Windows…

Not bad at all, hehe, for an operating system created twenty years ago by a young guy still at university.

Linux has won. And this is just the beginning.

It is important for all of us to know how to use Linux. It is a question of staying relevant.

Our forthcoming training courses

  • No training courses are scheduled.

Building a user interface

This topic is part of our Android Application Development training

Android Studio allows us to design user interfaces in two ways. The first one is via the powerful Designer Tool which features a drag and drop interface and very complete object inspectors as well as the possibility to immediately preview any changes. The second one involves directly modifying the actual XML files. With Android Studio, one can easily switch between the two.

The basic building block for user interfaces in Android is a View object which is created from the View class. The visual structure of a user interface is generally defined using layouts which are subclasses of the View class. The most commonly used layouts are Linear Layout, Relative Layout and Frame Layout. Other objects such as a TextView, a Button and a Spinner among others are then placed within the layout. The position of those objects within the layout will depend on the type of layout used and on the different attributes of the objects.

A word on the spinner
The spinner is often called a drop-down in other environments. Two examples are shown below (From and To). When clicked on, a pop-up appears and this allows the user to select one of the items. The data source for a spinner is flexible and requires an adapter to work. Android has a number of adapters built-in but one which is simple to use is the ArrayAdapter.

20150817 ForexWithStyle

Forex
The first application to develop is one which allows the user to convert among different currencies. The user chooses the currency to convert from and the currency to convert to using two different spinners, then enters the amount in an EditView and finally presses the ‘Convert’ button to get the result. For this user interface, a vertical Linear Layout is used to display the different objects mentioned above one below another.

ForexWithStyle
Now that we have our Forex app working, we want to make it look nicer. In Android, themes and styles are used to override the default look and feel of an application. Styles are just like CSS in web design. A theme is simply a collection of styles.

When building an app, styles are generally defined in /src/main/res/values/styles.xml. In ForexWithStyle we’ll apply the Material Design theme to the Forex app and simply modify some theme based colors which are usually used for branding.

To maintain compatibility with previous versions of Android, it is possible to have two styles.xml files (one found in /src/main/res/values/ and another one found in /src/main/res/values-21/) The latter will be used by devices running Android 5.0 (API 21) and above and the former by devices running previous versions of Android.

This topic is part of our Android Application Development training

Our forthcoming training courses

  • No training courses are scheduled.

App creation and deployment

This topic is part of our Android Application Development training

Android is a software stack for mobile devices that includes an operating system, middleware and key applications. Android is written by Google and most of its source code is released under the Apache license. Version 1.0 of Android was released in September 2008 and the latest version is currently 6.0 Marshmallow powering smartphones and tablets.

There are over one billion active monthly Android users and Android has become the best-selling mobile platform worldwide surpassing iOS (iPhone/iPad), Microsoft, Blackberry and Nokia with ease.

Android:

  • is an application framework which runs on the Linux kernel
  • has an ART virtual machine, compatible with a large subset of Java, optimized for mobile devices
  • has an integrated browser based on the open source WebKit engine
  • provides optimized graphics powered by a custom 2D graphics library
  • supports 3D graphics based on the OpenGL ES specification with optional hardware acceleration
  • has SQLite (SQL database) for structured data storage
  • supports media for common audio, video and image formats (MPEG4, H.264, MP3, AAC, AMR, JPG, PNG, GIF)
  • supports GSM telephony
  • supports Bluetooth, EDGE, 3G, and WiFi
  • supports a camera, GPS, compass, and accelerometer
  • finally, provides a rich and powerful development environment called Android Studio which includes an emulator, tools for debugging and memory and performance profiling.

Developing applications for Android

The following needs to be true for someone to be able to develop an Android application:

  • The development computer needs to have a Java Development Kit (Oracles’s JDK or OpenJDK are both fine).
  • The Android Software Development Kit needs to be installed.
  • Android Studio needs to be installed.
  • Finally, Android platforms and other components need to be added to the SDK. One example might be the Android 5.1 to target the latest devices or the 2.3.3 platform in order to be able to develop and test applications for older devices running Android 2.2.3.

Java is a powerful programming language which fully supports the object-oriented programming model. A good and free, if somewhat outdated, reference for the language is Thinking in Java (3rd edition) and is available at:

  • https://www.knowledge7.com/community/thinking-in-java-3/

A quick start: Hello World

The first application to develop is HelloWorld which should simply display a nice “Hello World!” message when launched. The content of the HelloWorld project as generated by Android Studio should be explored (build.gradle, AndroidManifest.xml, src/main/res/, src/main/java/, etc.) and understood. The HelloWorld app can then be launched on a real Android device to check whether it is working properly.

In Android, apps generally have layouts (screens) which are defined in XML files in src/main/res/layout and behaviour is defined in Java in various files found in src/main/java.

The Activity lifecycle

An activity represents a single screen with a user interface. An application can have multiple independent activities.

When an app starts, Android chooses what activity to start initially based on information found in AndroidManifest.xml and ultimately calls its onCreate method. A programmer can specify what the activity should do when it starts by overriding this method.

What Time Is It?

20150811-whattimeisit

The second application to develop is called What Time Is It. It displays one button which fills in the whole of its activity. When the button is clicked, the text shown in the button will be updated to the current date and time.

The way to do that is to add an Android button to the activity (this can be done by dragging a button to the layout and making it matching the width and height of its parent (i.e. the whole activity)), modify onCreate to make sure that the button shows the current date and time initially and setOnClickListener to update the label to the current date and time each time the button is pressed. The recommended way to do that is to use a Java inner class.

This topic is part of our Android Application Development training

Our forthcoming training courses

  • No training courses are scheduled.

Debian Linux, CentOS Linux or FreeBSD

20150810-debian-centos-freebsd

A lot of people regularly ask me what Linux distribution they should use. Naturally, I always tell them to use the one they are the most comfortable with.

Of course, some applications, most notably Oracle software, are certified on only a few distributions so, if the objective is to have, say, the Oracle Application Server running, the choice of the distribution is limited. On the other hand, if the objective is to have a server running an open-source software such as the Apache Web Server, then there is no restriction at all: you can use whatever distribution you would like.

Personally, I tend to favour CentOS Linux. The reason is that, over the years, I have become quite knowledgeable in RedHat-based Linux distributions such as RedHat Enterprise Linux (RHEL) but I prefer using a free Linux distribution as opposed to pay for support. Next week, we will run a Linux training at Knowledge7 and the distribution we will use is CentOS Linux 7.

Our next Linux System Administration training starts on Wednesday 19 August 2015

Learn more

For historical reasons, I also use Debian Linux on some of my cloud-based servers. A few years ago, there was no automatic migration path from one version of CentOS Linux to another (e.g. from 5 to 6) and I couldn’t accept having to reinstall an operating system from scratch each time a major version was released. This is why I chose Debian Linux which, since it’s inception twenty years ago, can be upgraded to the latest version just by issuing the appropriate command. For the past ten years, Debian Linux has been rock-solid on my servers and there is absolutely no reason for me to change if it ain’t broke.

Linux or something else…

We Linux enthusiasts sometimes forget that other open-source (i.e. free) operating systems exist. One good example is FreeBSD which is a descendant of the original UNIX (by Dennis Ritchie and Ken Thompson) and which is adored by its users.  All usual open-source software run very well on FreeBSD including web servers, databases, etc. I know quite a lot of people, in Mauritius and elsewhere, who run FreeBSD on their production servers and they are very happy.

What is interesting with the open-source ecosystem is that we can try multiple operating systems for free before we decide.

Have fun!

Our forthcoming training courses

  • No training courses are scheduled.

Special Linux training

20150614-special-linux

During the next few days, we will train a number of people in various Linux technologies. The list of topics is as follows:

  • Introduction to Linux
  • Text Editing and Processing
  • User management and file permissions
  • Administrative tasks (Control services, Logging)
  • Networking (and the Secure Shell)
  • Devices and File-systems
  • Package management and installation
  • Process management
  • Shells, Scripting and Automation
  • Virtualization and Containerization

As you can see, there is quite a lot to cover in five days but we, at Knowledge7, will do our best and, I’m sure, the participants will too.

Our forthcoming training courses

  • No training courses are scheduled.

Accessing native features: the Camera

This topic is part of our Mobile Application Development with HTML5 training

20150317-smartphone-camera

In addition to the GPS, a mobile device generally have other various sensors like the camera, a compass and an accelerometer. Provided a suitable plugin exists, apps built using Cordova can leverage these sensors. For example, using Cordova Camera plugin, it is possible to add picture taking and picture browsing capabilities to an app.

The work to do is:

  • Enhance the app to allow users to take a photo.
  • Display the photo just taken in the mobile app.
  • Save the photo to the photo album after capture.
  • Retrieve a photo from existing photo library.
This topic is part of our Mobile Application Development with HTML5 training

Our forthcoming training courses

  • No training courses are scheduled.

Geolocation and Google Maps in HTML5

This topic is part of our Mobile Application Development with HTML5 training

Mobile devices generally have various sensors like the camera, a GPS, a compass and an accelerometer. It is instructive to see how one can use the standard HTML5 API to, for example, know where the device is located. This then opens all sorts of possibilities like for example, displaying the songs which are the most popular where the user is.

The work to do is:

  • Obtain the current coordinates using the HTML5 API. In Cordova, it is important to add the Geolocation plugin to the app.
  • Use the Google Maps API to do reverse geocoding (i.e. determine country name given location). It is important to get a Google API key before attempting to use the Google APIs. If you are using Google Chrome, you may find the device sensors emulation feature useful.
  • Display the artists and songs of the country we are located (if possible)
  • Add a Google Map to the application to show where the user is.
This topic is part of our Mobile Application Development with HTML5 training

Our forthcoming training courses

  • No training courses are scheduled.

User Interface Elements

This topic is part of our Mobile Application Development with HTML5 training

jQuery Mobile has a number of elements like buttons and icons to make the user interface more usable. jQuery Mobile also provides a number of built-in themes as well as allow the developer to customise the CSS attributes of any element being shown.

The work to do is:

  • Add a theme to the initial page (including the header and the footer)
  • Use custom styles using normal CSS
  • Create and use a custom theme made with ThemeRoller
  • Fix the position of the header (or the footer)
  • Add icons to buttons
  • Group buttons
This topic is part of our Mobile Application Development with HTML5 training

Our forthcoming training courses

  • No training courses are scheduled.
« Previous Page
Next Page »

Looking for something?

Want to know more?

Get our newsletter

Discover the latest news, tips and tricks on Linux, the Web and Mobile technologies every week for FREE

This work is licensed by Knowledge7 under an Attribution-NonCommercial-ShareAlike 4.0 International (CC BY-NC-SA 4.0) license.